fantasticwoodworking
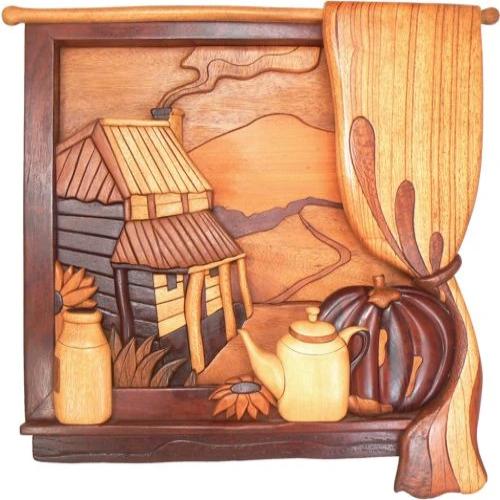
Pumpkin Cottage Intarsia Pattern
Pumpkin Cottage Intarsia Pattern
Couldn't load pickup availability
A challenging project but by building it in layers it is not quite so difficult as it may first appear.
Make a picture frame and place the background in it.
Glue the completed cottage on top of the background. Then make separately
- flowers
- grass
- milk
- bottle
- teapot
- pumpkin
- curtain and rail.
Glue each of these on top of the layer below.
The individual parts are relatively easy but combine into a stunning whole.
But don't take our word, check out some of our Customer's Finished Pumpkin Cottage Projects.
This comprehensive, full size, pattern will take you step by step through the construction process.
Finished Intarsia Size:
380mm x 410mm (15" x 16")
Number of Pieces:
177

Plan Size:
A2 420mm x 594mm (17" x 24")
This is a small section of the very detailed computer drawn plan that will guide you through the construction process
Some Sample Timbers used in this piece
 Banksia |
 Pencil Cedar |
 Quandong |
 Bloodwood |
Use these samples as a guide to colours only. You should use wood that you can easily obtain locally.
The pattern includes detailed guidelines on choosing suitable timbers. Need more timber colours? Check out our guide to Ebonizing and Bleaching Timber here.
Share


